Did you like the article? Share it!
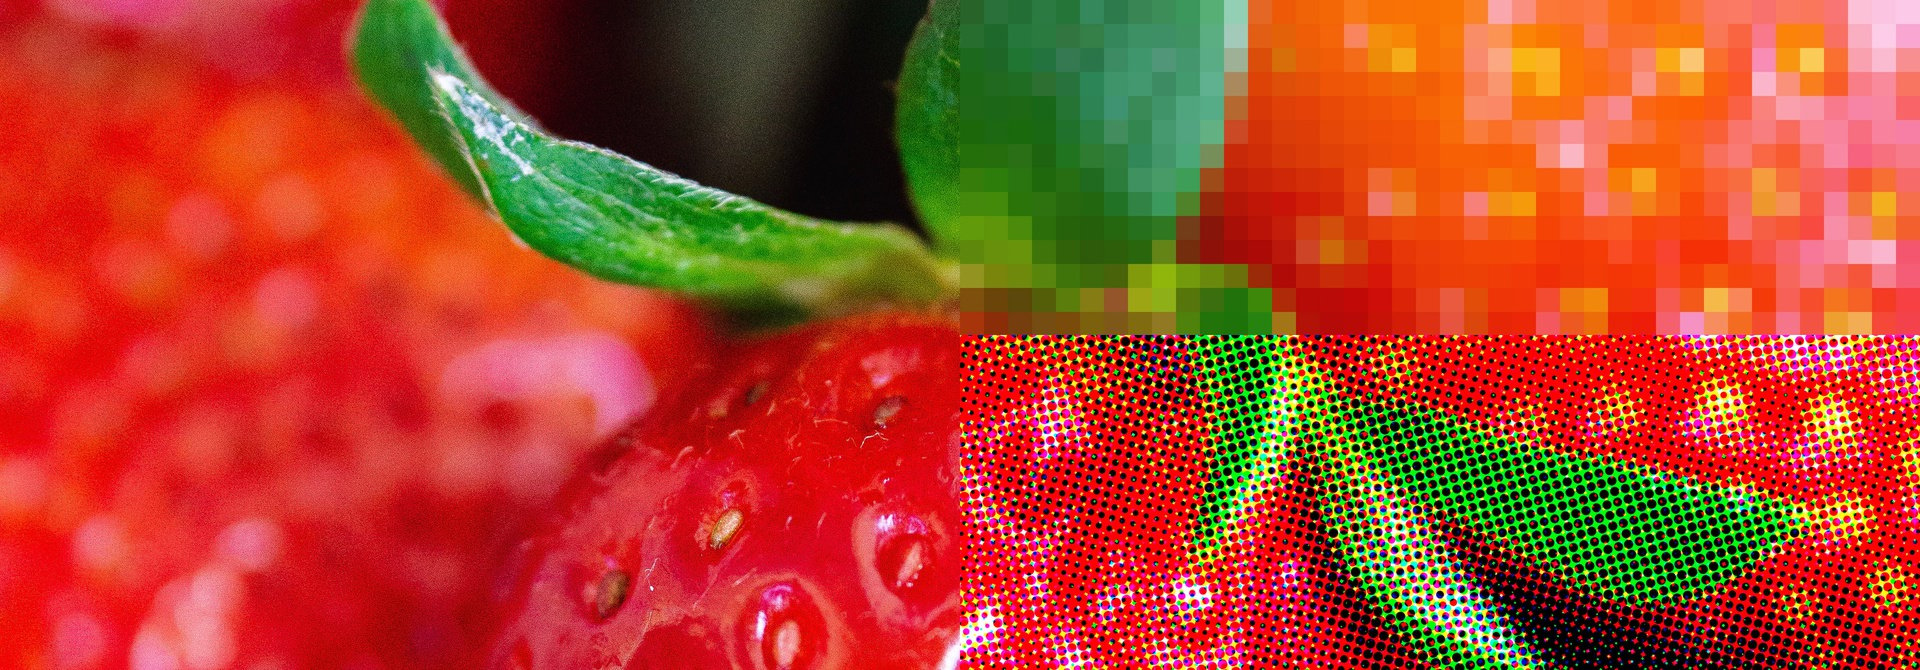
In a previous article, we discussed vector graphics and the differences between vector and raster. In case you missed it, you can read the article here. Vectors are described mathematically using points, lines and curves and are created regardless of the size and resolution of the image. On the other hand, the rasters are made up of pixels and have their size and resolution established when the image is created.
Vector file formats are those with the extensions .ai (Adobe Illustrator), .eps (Encapsulated PostScript), and .svg (Scalable Vector Graphic), while those of the most common raster files are .jpg (Joint Photographic Experts Group) and .png (Portable Network Graphics).
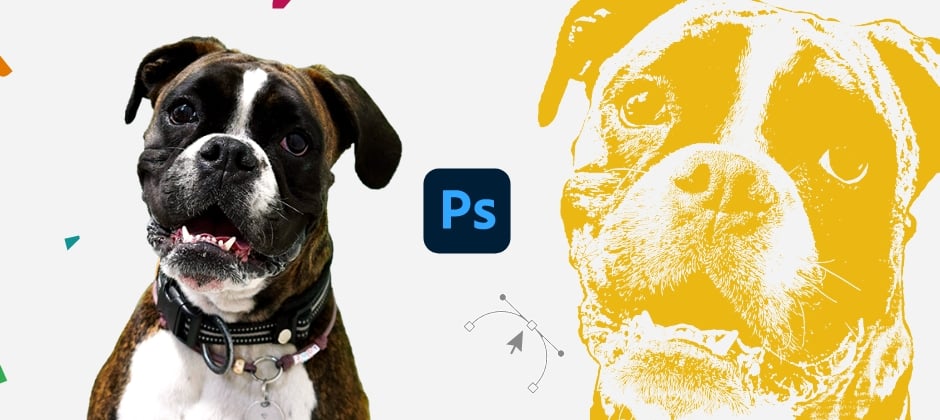
As promised in the previous article, in which we explained how to convert to vector in Illustrator, here is the tutorial for vectorizing an image with Adobe Photoshop. Even today, it is a professional method, requiring at least a basic program knowledge. If you have never used Adobe Photoshop before, I anticipate it will be difficult for you to follow the steps.
Adobe Photoshop is the best-known photo editing software among professionals and non-professionals. It is not explicitly designed to work with vector graphics because Adobe Illustrator is there for that, but it also offers a way to vectorize an image. This method is handy for all those photos with more complex subjects, such as portraits.
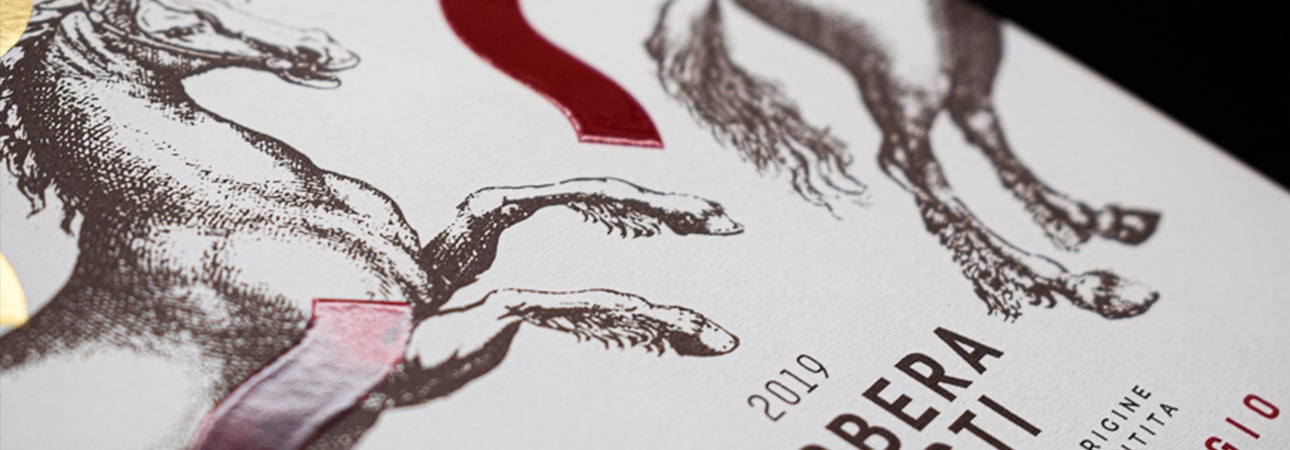
If you need to transform, for example, the face of a character or a friend into a vector to insert cartoon style in your project, Adobe Photoshop becomes the best way to do it.
Manually redesigning an image to vectorize it is a long job. It requires experience and a few manual skills with the tools. Unfortunately, resorting to an automatic conversion does not always pay off. The best choice to do a good job is to proceed one step at a time, and with little tricks, I assure you that it won't take long.
Let's see Photoshop's steps to convert an image into a vector.
Step 1. ➪ New file
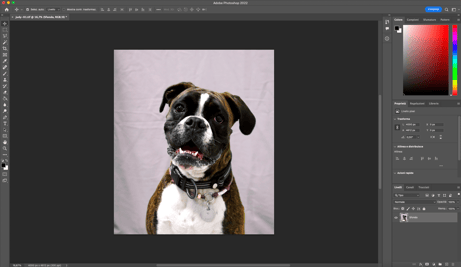
Open the image you want to convert in Photoshop; then go to File > Open and select your photo.
The premise, the conversion itself, is nothing too complicated. The part that requires a little familiarity is the one that will follow now, which is a fundamental step for the job's success. I'm talking about cleaning the image and highlighting the subject's details to make them appear in the illustration to obtain an optimal result. Of course, all of this depends on the degree of complexity of your image, but let's go one step at a time.
If the image you need to convert is already on a white background and is without shades, in a single colour, such as a logo, you can go directly to #Step 4.
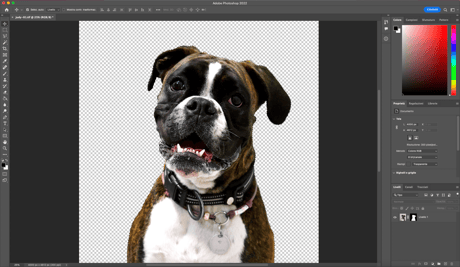
Step 2. ➪ Delete the background
The first thing to do is to eliminate the background to isolate your subject. To do this, you have mainly two methods:
- contour the subject with the Pen Tool.
- make an automatic contour by going to Select / Subject (valid only from the 2021 version of Adobe Photoshop).
If you choose the first option, after drawing all the outlines of your subject, go to the Paths panel and with the path active, right-click > Make Selection. With the second option, the selection will be created automatically.
Either way, once you've made your object selection, you can create a clipping mask or make a reverse selection and delete the part you don't need. To create the mask, click in the Layers panel on the Add Mask symbol at the bottom with the selection active. For example, to make the Inverse Selection, go to Select > Inverse and then delete [Delete / Backspace key]. A window will open, set the colour to White from the Content menu and click OK.
.
Step 3. ➪ Highlight details
You need to enhance your image to highlight the details at this point. To do this, you need to do more operations with some tools, which I will tell you now until you reach an optimal result.
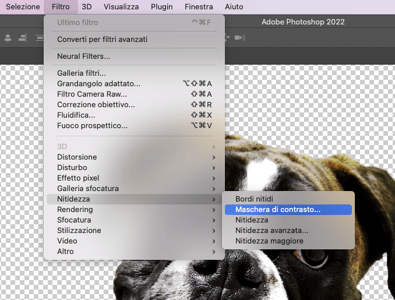
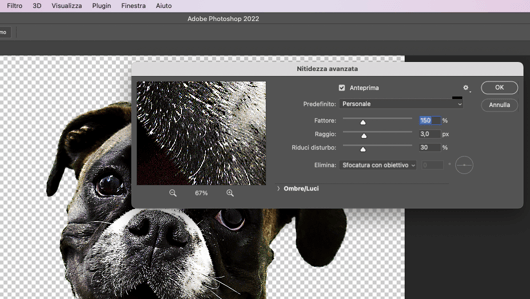
Start by increasing the sharpness. To do this, go to Filter > Sharpen > Unsharp Mask and adjust the values according to your image; when satisfied, click OK (don't be afraid to overdo it).
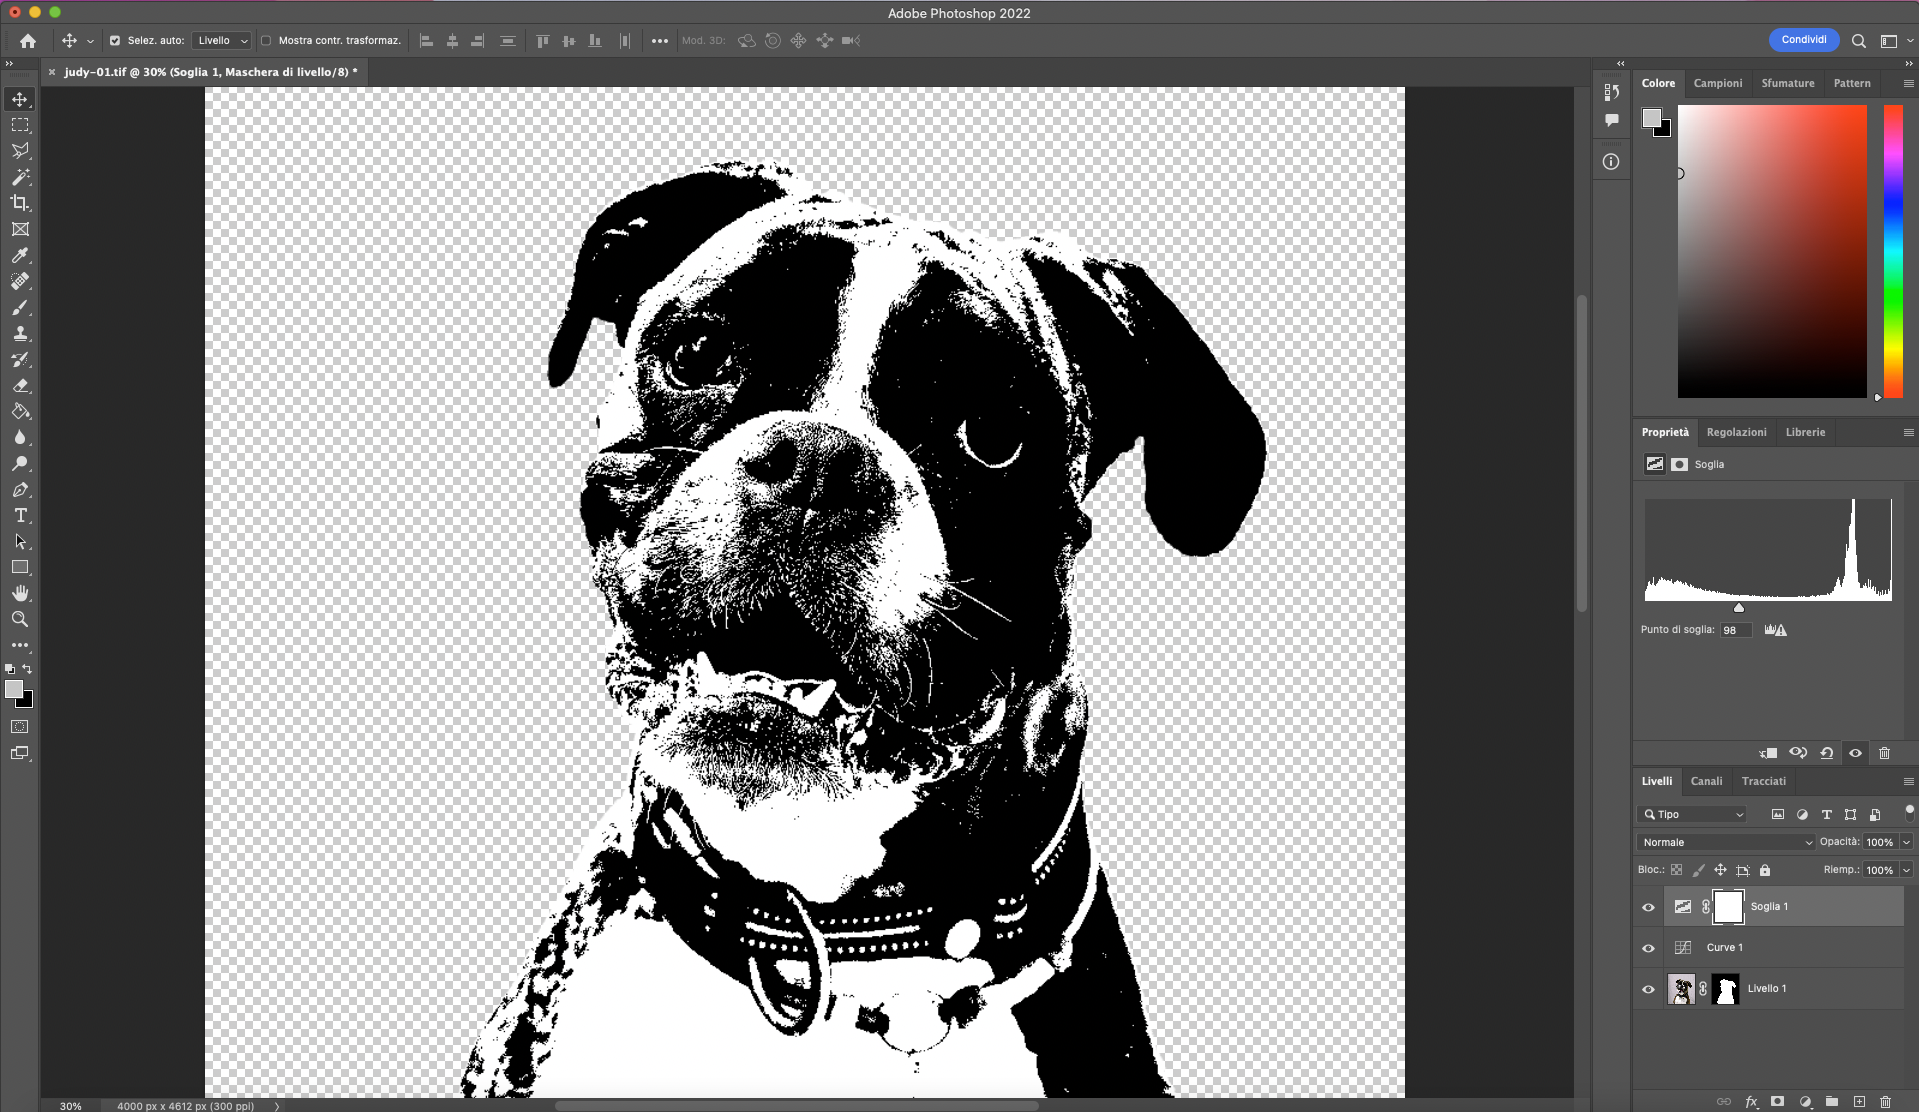
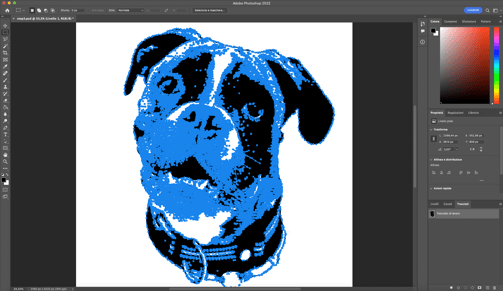
After that, create a New Adjustment Layer and choose > Threshold; here, too, in the panel that will appear on the screen, move the slider and establish the right threshold point suitable for your image. The key details must be there, but the image shouldn't be too full. Once this is done, merge the visible layers into a new layer using the combination Ctrl / Comm + Alt / Option + Shift + E
This will depend on your image. These steps are more than enough if you need to convert a reasonably simple image. Instead, if you have a more complex one, you will have to work more on the original image. Experiment with the Sharpen tool, Curves adjustment or whatever you prefer to increase the contrast and bring out the details.
Step by step, your vector image begins to take shape. First, create another New Layer > Solid Color and set a white background to your image to better see its outlines. Now that we have obtained a drawing entirely in black and white, if necessary, we can still go and intervene on the image with the Brush tool. The goal is to fill in all those small parts that did not give a clean result during the previous steps. So take the Brush tool from the Toolbar on the left, and start "colouring" your image.
Step 4. ➪ Convert to vector
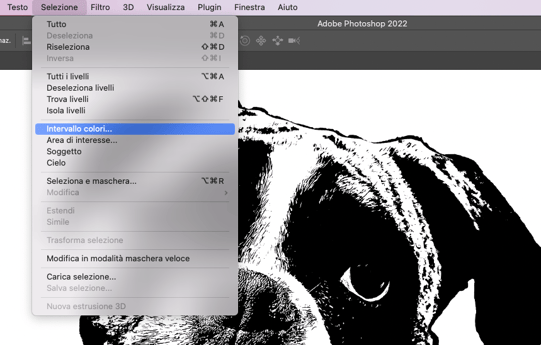
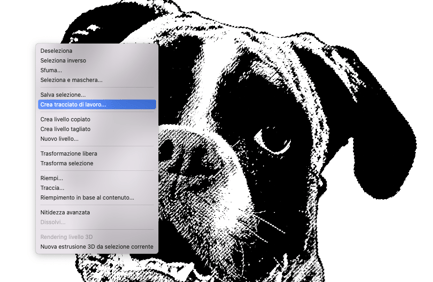
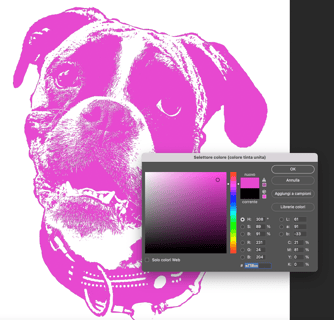
We have finally reached the point where your image will become a vector element. To do this, click on the last created layer, go to Select > Color Range and from the drop-down menu, select Shadows and click OK.

Now with the selection active, go to the Toolbar on the left and select any Selection Tool, for example, the Rectangle; go back to your image and do Right Button > Create Work Path. With this step, the path of your drawing is created; go to the Paths panel (to open it: Window> Paths) and double click on the selected path, give it a name and Save the path.
At this point, you have two ways to conclude:
- export your path as Paths for Illustrator
- create a new Solid Color layer to assign the path to.
For the first option, with the path active (if you are out of the selection, go to the Paths panel and click on your path), go to File > Export > Paths to Illustrator.
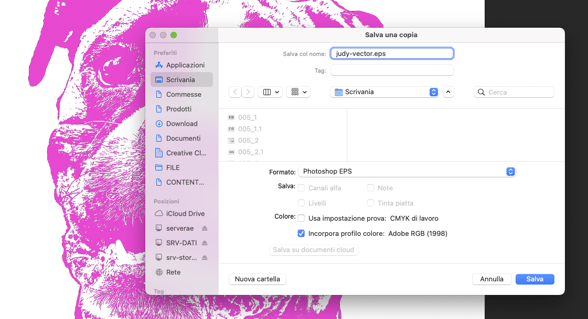
For the second option, always with the path active, create a New Solid Color Layer; doing so will create a new layer with your drawing in vector format. To do a quick check, you can check that enlarging the image does not change its quality. Make Ctrl / Comm + T, and with the handles, enlarge the rectangle to scale the drawing; as you can see, the edges remain sharp. Then, all you have to do is export your vector illustration. Go to File > Export and choose the Photoshop EPS [.eps - Encapsulated PostScript] format, which can contain both vector and bitmap graphics.
With a little effort, we have reached the end of this tutorial. As anticipated at the beginning of the article, converting a complex image into a vector or digitally redrawing it is never a simple thing. It takes time, a lot of patience and a little familiarity with the software.
I hope this guide will be helpful to you! Remember, the Oppaca team is at your disposal and will gladly answer your questions, so do not hesitate to write to us. Share your new project with us. Who knows, maybe a happy collaboration will be born! To the next article :)
Related post
Learn more

May 27, 2022

May 25, 2022