Did you like the article? Share it!

A well-done pattern can be handy. It can be applied to any background, on a website, a poster, a fabric rather than packaging. This short tutorial will show how to make pattern Photoshop, starting from a drawing or an icon.
To create patterns in Photoshop, you can start from different elements, from an icon, a digital drawing or the scan of one made on paper, in the old way in pastel or watercolour. Find out how to create a “ seamless pattern”, a repeatable pattern without interruption (without interruptions, continuous).
Before starting, however, I would like to remind you that Photoshop is not a vector program. Therefore, the patterns created with this software, starting from an image, always remain raster. If you are interested in making a vector pattern, check out this other tutorial!
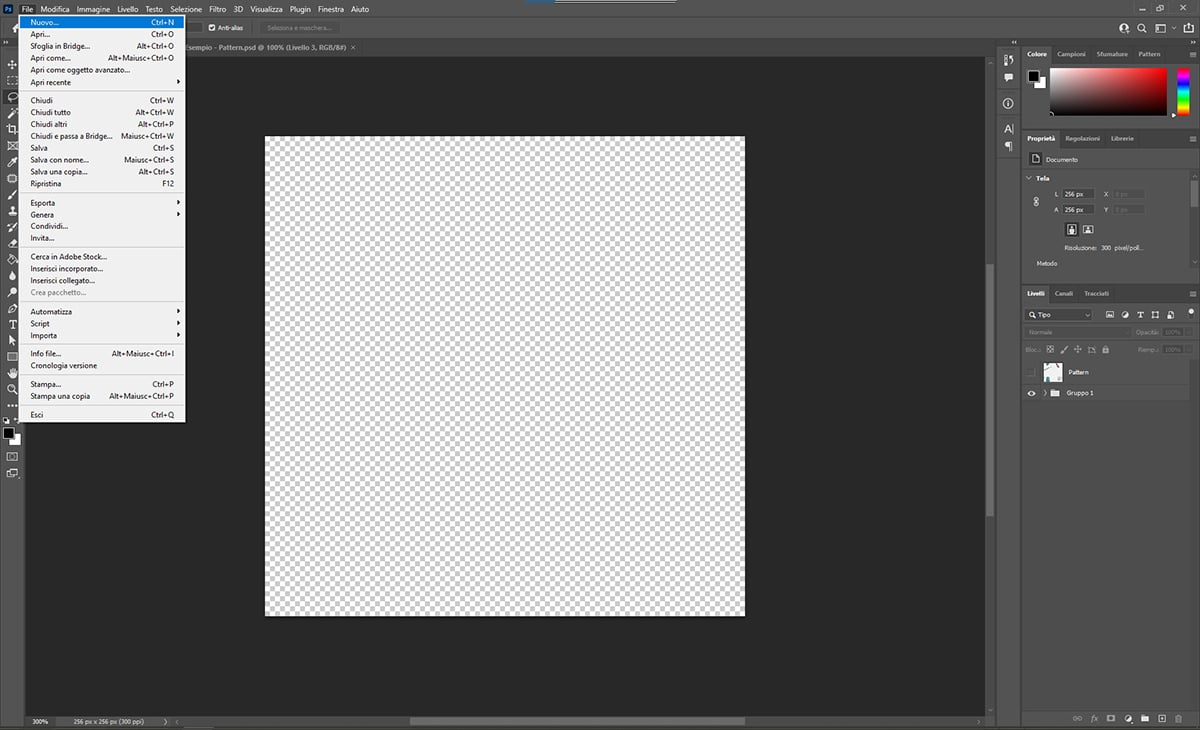
# Step 1: create the base of your matrix
So, the first step is to create a new file by going to File> New and entering the dimensions; it can be any size. The important thing is that the width and height are the same: In our case, the board measures 256px for each side. This is your workspace, which will become your saved pattern template at the end of the tutorial; for this reason, it is good to choose sizes that are not too big. In any case, if you change your mind later, you can constantly update the size of the table from the top menu Edit> Image Size.
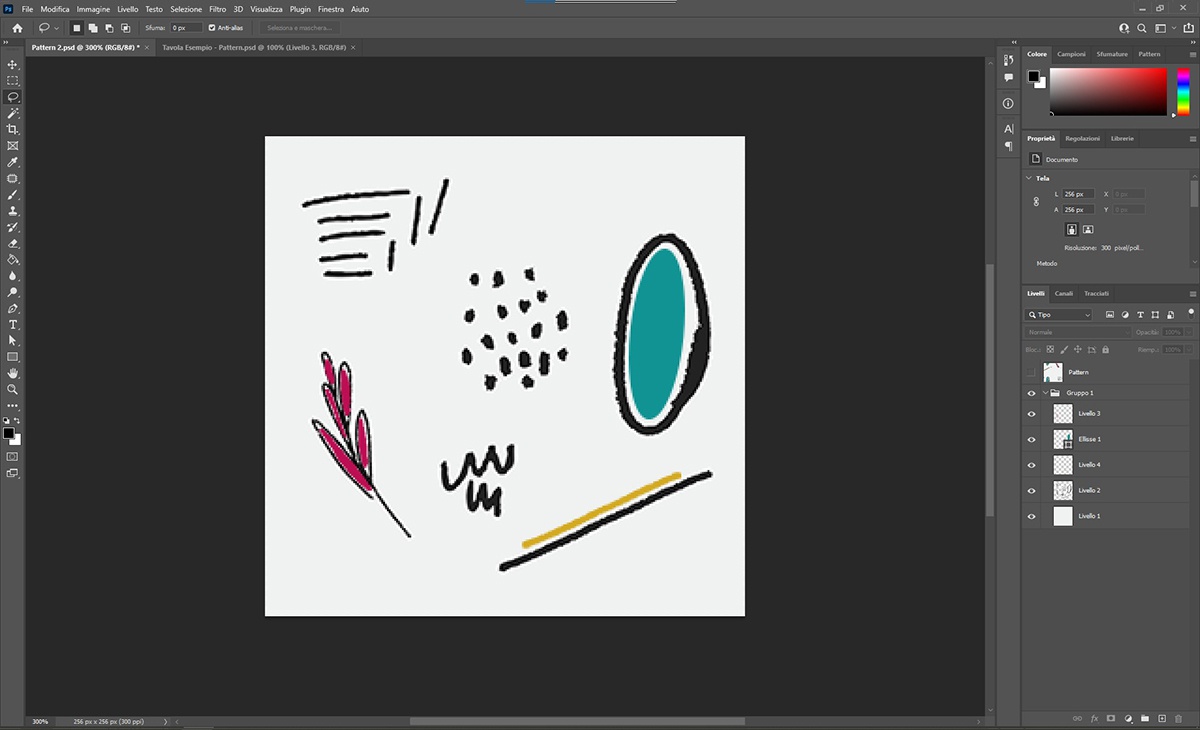
# Step 2: define the motif of your pattern
At this point, you need to enter the graphic motif you have chosen to use. We have used a series of small drawings already created digitally, but if you want to use a picture on paper instead, the first thing to do is perform a scan or a high-resolution photo.
Once this is done, it is necessary to clean the image by isolating the objects on the drawing and uniforming the background in a single colour. It can be white or coloured according to the result you want to obtain, or it can have no background and therefore be transparent to use in png on any coloured surface. To clean the background and bring it to a uniform white, you can use the Image> Tonal Values command; this will also affect the picture and help you slightly correct it.
Attention! This last step is to be skipped if you use shapes created directly in Photoshop or vector objects created with Illustrator or downloaded from Google.
# Step 3: set up your template
To create a seamless pattern and then make your image a repeatable way, you need to work a little on the board's edges to make the top side the same as the bottom and the left side same as the right. By doing this, your pattern can be placed side by side without seeing any detachment and used as a continuous filling on surfaces of varying sizes.
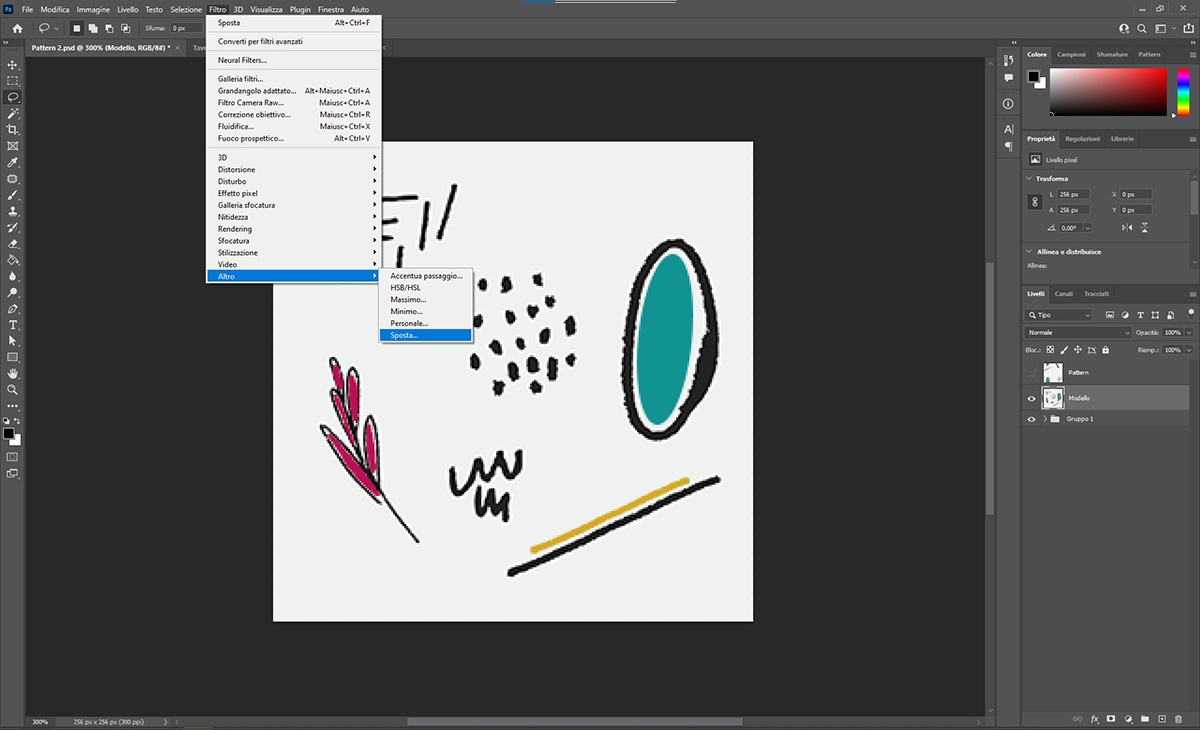
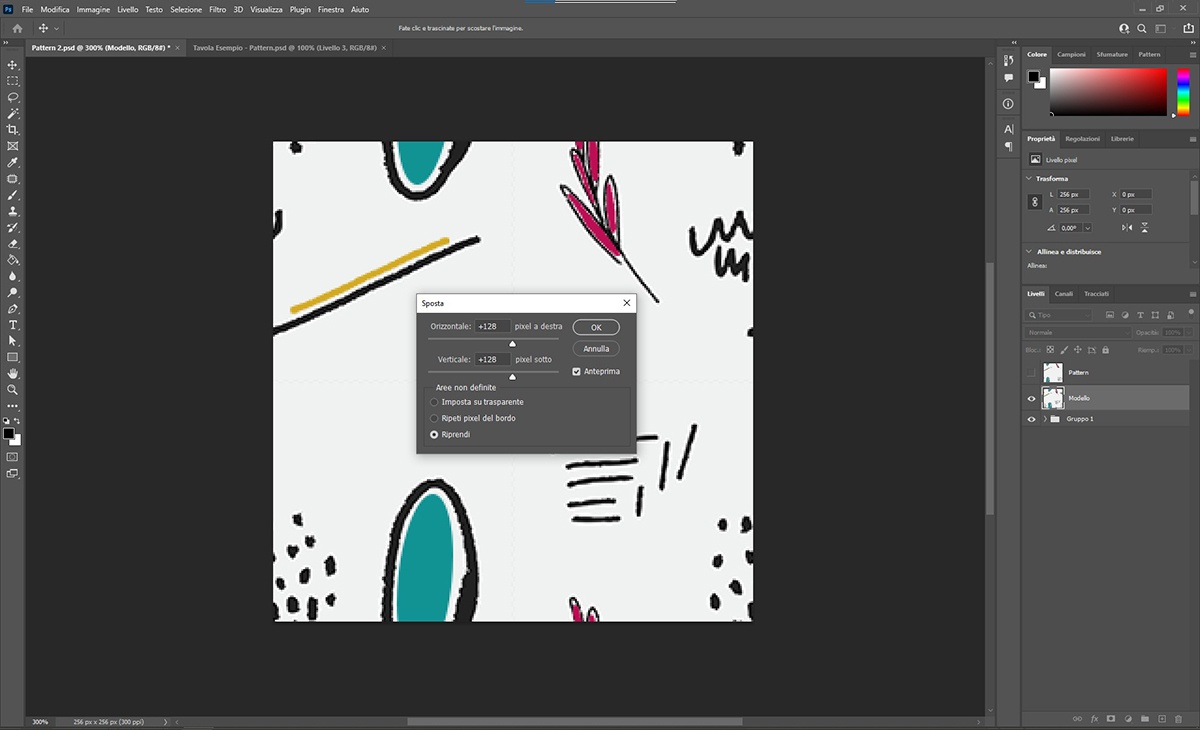
To do this, you must use the Photoshop command Filter > Other > Offset, which allows you to translate the image horizontally and/or vertically. The program automatically cuts the table's contents in half and moves it horizontally and/or vertically. It is essential to move the image by one measure, to make the edges of the basic model coincide correctly. The measure must be equivalent to that of the table, divided by 2. For example, in our case, the table measures 256px, so we set a displacement of 128px; you can decide whether to move only horizontally or even vertically. Thanks to this tool, the sides will coincide without problems as the image is automatically cut from its centre.
Attention! Before using the Move command, if the various elements of your model were on several separate layers, it is necessary to merge them into a single layer, selecting them by holding down Shift and then clicking with the right button> Merge Layers. Otherwise, the command will not work correctly.
# Step 4: define your pattern
Great, now your image is ready to be transformed into a repeatable form!
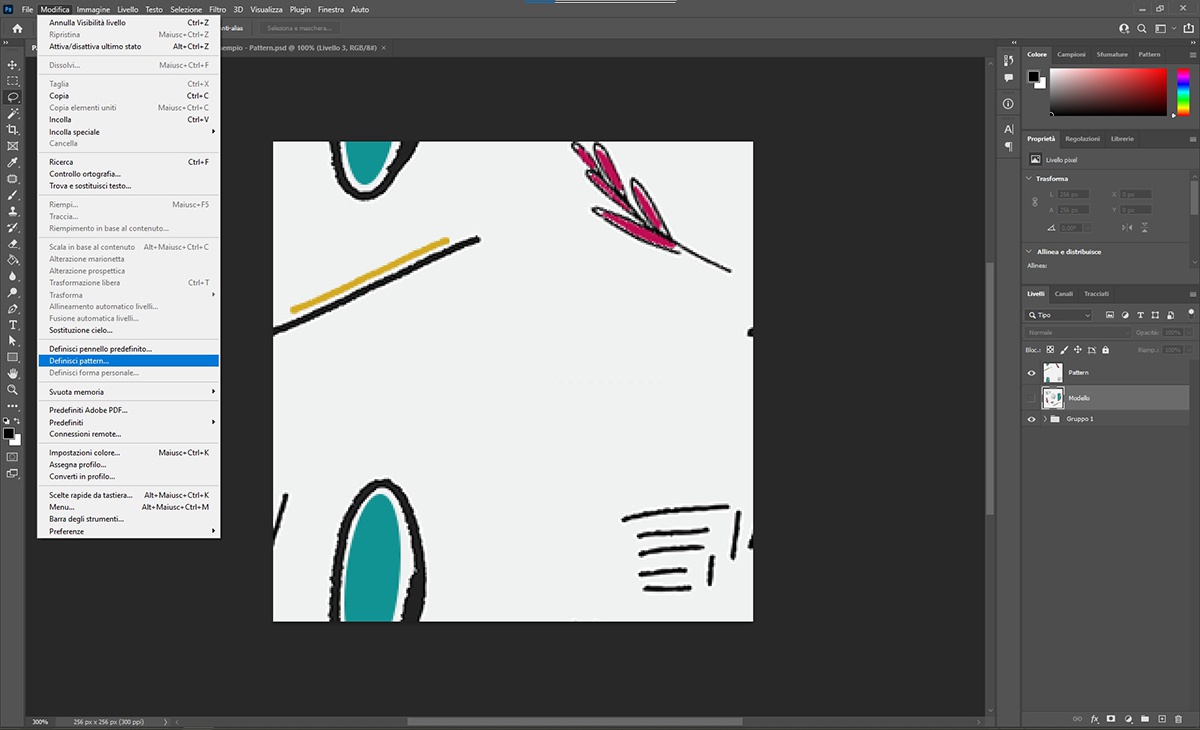
To do this, go to Edit> Define Pattern; in doing so, your pattern is created. At this point, a window will open asking you to assign them a name; remember, naming the elements according to a criterion will allow you to find them more easily later on.
# Step 5: apply and use your pattern
Well, now that you've made your pattern, you have to try using it. To do this, open a new file by clicking on File > New. Remember, though, to see the final result. It would help if you created a larger board than your pattern template; our table, for example, measures 1200x800px.
At this point, there are several ways to apply it:
▸ From Edit > Fill > Content: Pattern (then going to choose the one you made)
▸ Double click on the main level; the Layer Style > Pattern Overlay panel opens (you can select your pattern).
▸ With the Paint Bucket tool (side toolbar), it is possible to choose the pattern mode with a drop-down menu and select the desired one from the top bar. By clicking on a point on the table, it is applied.
The pattern can also be used through the Pattern Stamp tool; you can always find it in the sidebar of the tools, under the Clone Stamp. The difference from the previous methods is that in this case, the entire table is not filled, but you can choose where to apply it, just as if you were using a brush or a stamp.

That's it. In just a few steps, we have seen how to make pattern Photoshop to be used in your graphic projects. Now you have to have fun trying and trying different patterns and modules until you find the right one to create your custom pattern.
If you are a drawing enthusiast, digitize your creations and transform them into a pattern, as we did today, to apply it to objects, fabrics and much more. And if painting and drawing aren't your things, don't worry; Google is full of resources, even free to use.
Remember, for whatever the Labelado team is at your disposal, feel free to write us.
See you next article!
Related post
Learn more


May 25, 2022