
Did you like the article? Share it!
A pattern can make a creative work visually more attractive and recognizable. It can make a real difference in the world of design, even more so if it's a custom pattern. Creating one from scratch is not difficult. We are there to help you! Let's see together how to create a pattern on Illustrator.
In a previous article, we have already talked about pattern design: from its definition and history to its importance in graphic design. Today, however, we want to explain to you how to create a pattern on Illustrator: from a practical point of view. We cannot tell you that it is good to use them without explaining how to design a custom one created specifically for your brand.
As mentioned earlier, one software that can be useful for creating more or less complex patterns is Adobe Illustrator. Therefore, let's start with a straightforward tutorial that will guide you in this operation. It is now clear to create graphic motifs of this type, thanks to a powerful Illustrator function introduced by the CS6 version. It will only take you a few minutes, word of the Labelado team. Let's start!
# Step 1: create the matrix to repeat
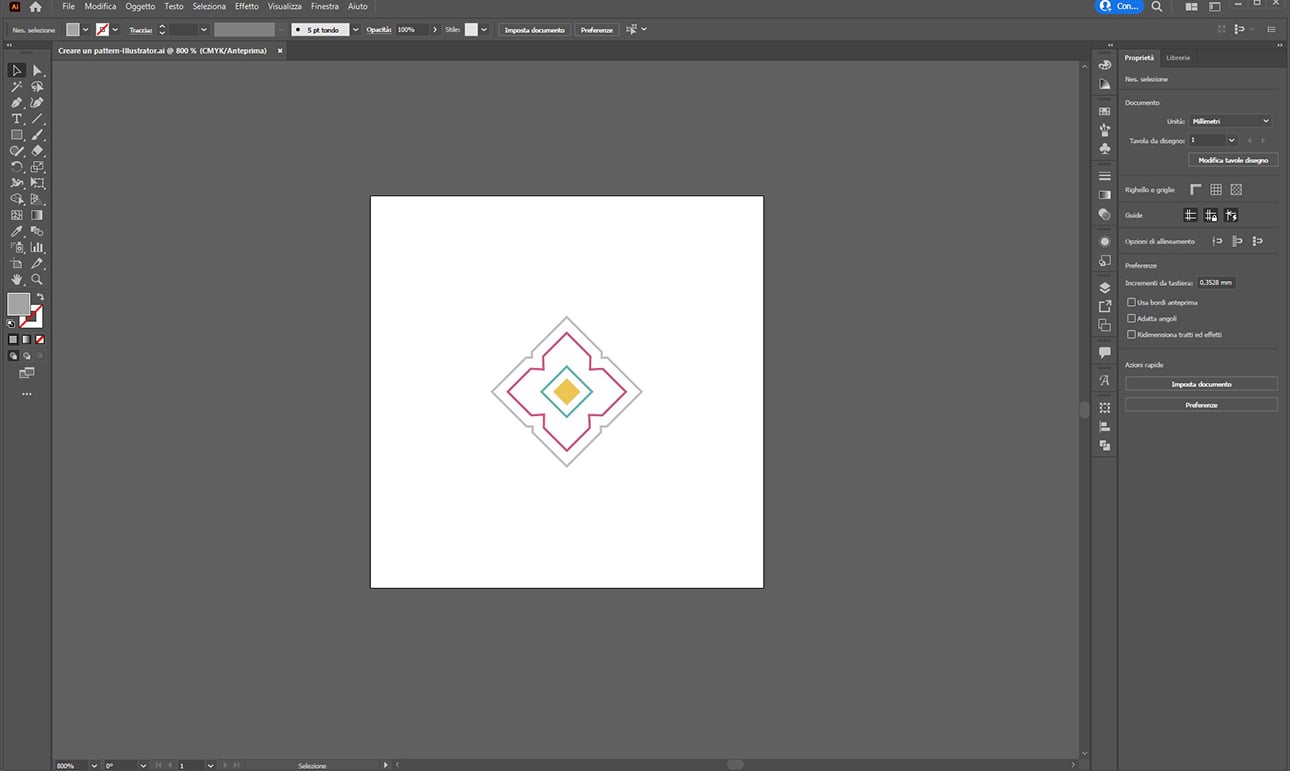
So, the first thing to do is open a new Illustrator file by going to File> New and creating the basic motif of the pattern, or the “matrix”, which will then be repeated. It can be a single graphic element, a combination of shapes, a design or a more or less complex decorative motif. Our advice is to start from a small part so that once repeated, it gives a pattern effect more expansive.
Remember, this basic unit is ideally contained within a square, and the repetition of the courts will give life to the final result. Your motif must therefore be inscribed in this square, and the two elements must be centred between them; to do this, use the Align command, you can find it in the Window> Align menu. The space between the element and the edge of the square will be the margin with which the repetitions of the pattern will be spaced.
You can use an existing vector image or draw one from scratch to start creating the pattern. You can withdraw from both a vector element and a raster image. The complexity of the pattern will depend on the geometric repetition of these essential elements.
# Step 2: use the "Create pattern" function
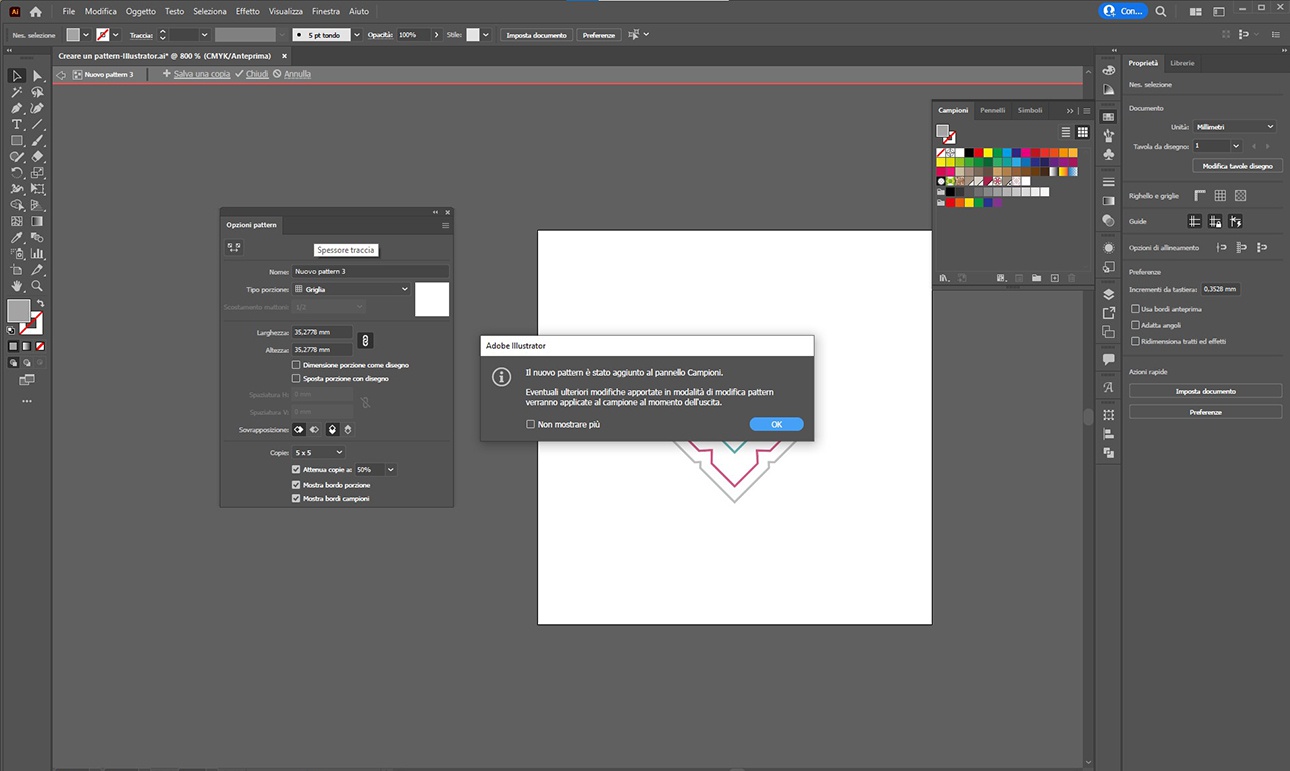
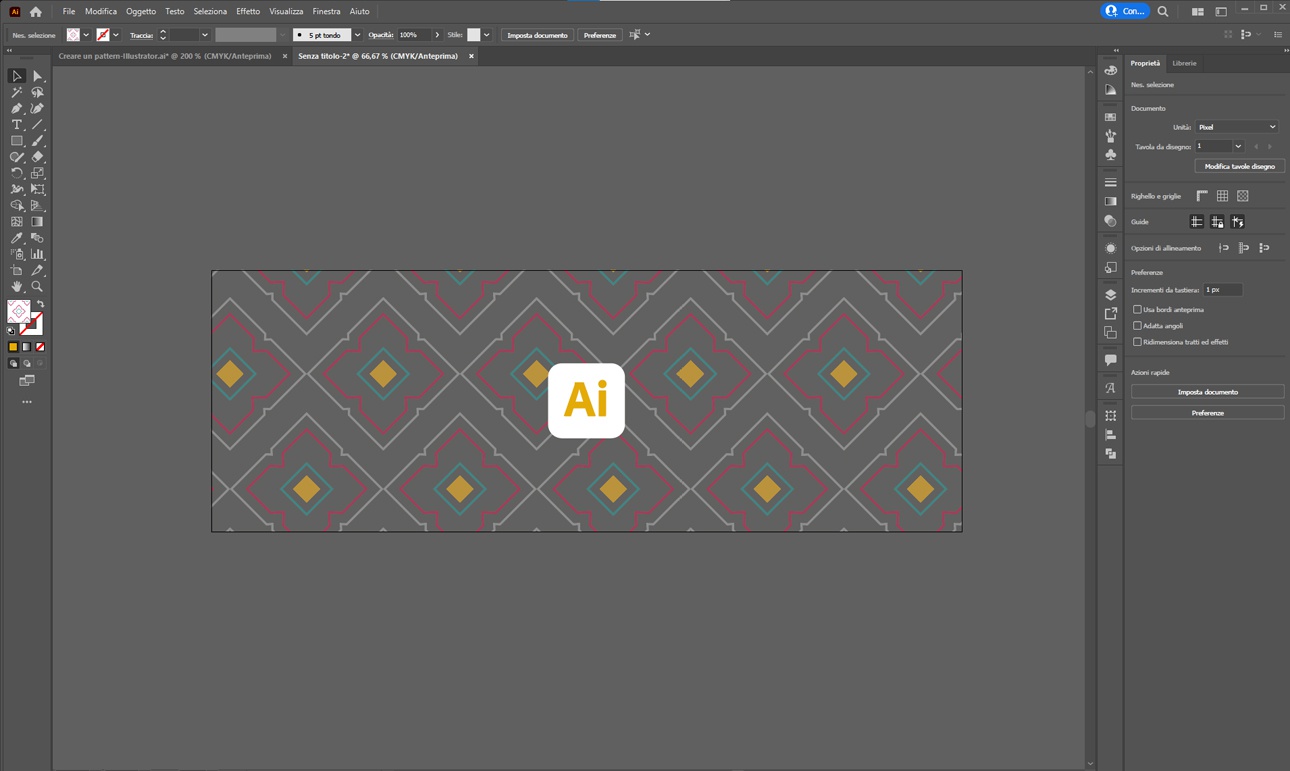
At this point, we proceed using the powerful function we were talking about before, which is called Create Pattern. To create the repetition of the pattern, select your basic motif and click on the Create item. You can find it in the top menu Object> Pattern> Create. By clicking, you will see a window open that warns you that the pattern has been added to the Swatches panel.
Your custom pattern is ready. As we mentioned earlier, you can find it in the Swatches panel; from here, you can use it as a fill pattern for any shape or element.

# Step 3: adjust the composition
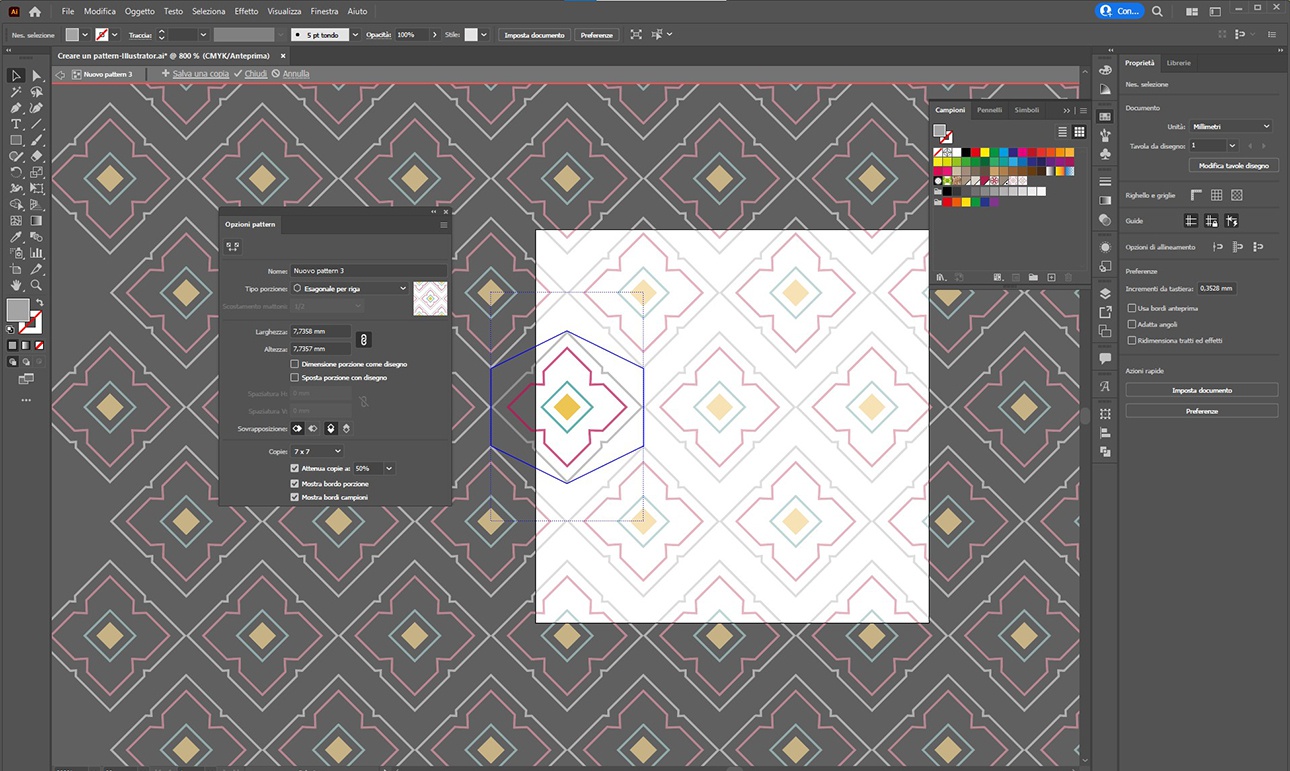
By clicking on Create, your pattern has been calculated and created starting from your base pattern; now, however, it is necessary to set some parameters such as a name (to find it among the samples), the type of structure and repetition, etc. All you can do from the panel that has opened to you on the left is Pattern Options. Setting these parameters allows very different effects; the structure of the repetition determines the type of pattern that will be created: you can choose between grid, brick by row, brick by column, hexagonal, etc. - see example photo.
As you may have noticed at this point, the modification of these settings from the Pattern Options panel is done in real-time on the pattern preview. The panel also allows you to choose the size (width and height) of the matrix's spacing and manage their overlap.
In short, this is the phase in which you have to experiment with the different parameters of the panel to get the result you are looking for. Remember, however, that in addition to the option settings, you can always act on the original base motif, moving or resizing the elements, rather than changing their stroke or fill colour.
# Step 4: save the pattern and apply it to a surface
The pattern is automatically saved and updated in the Swatches panel with each change. Once you have obtained the desired result, you can select the pattern icon from the panel to fill any element or shape. You can change the pattern at any time by double-clicking on it from the Swatches panel. The Pattern Options window will reopen, and clicking on the pattern preview (top right) will return to the editing view.
Do not forget that the pattern has a specific size. To allow the repetition of the matrix, and therefore, to have a proper pattern effect, you will have to apply it on an element more extensive than the original matrix. The larger the part is compared to the primary motif, the more the pattern will render.
If you want to create a similar one, starting from the same matrix, perhaps changing the colours of the elements, you can duplicate it in the Swatches panel by selecting the pattern icon and dragging it to the [+] at the bottom right. By doing so, a copy will be made. You can edit the matrix, obtaining a second pattern, accessible from the Swatches panel and editable from the Pattern Options panel.
Now you are ready to use the Pattern Maker tool. You have to experiment with infinite partners and use them for your brand or projects. Try and retry schemes until the result convinces you; start from something simple. A pattern does not necessarily have to be complex to be effective. Maybe use your logo or distinctive graphic signs for your brand, and if you don't know where to start, Google can prove to be an excellent ally. On the web, you can find many resources, even free, vector and not to be used for your graphic design projects.
For today we conclude here, we have seen together how to create a pattern on Illustrator. We will also see how to make them with Adobe PhotoshopⓇ or use them in graphic projects in a future article. Feel free to write us for anything the Labelado team is at your disposal.
Related post
Learn more

May 25, 2022

May 25, 2022
May 26, 2022